DoorWayGym User Manual
- The DoorWayGym utilizes an aluminum spring loaded bar to stay positioned within the doorframe.
- After the user adjusts the device in the desired position, a locking collar is used to tighten and secure the device in the doorframe.
Mounted on each end of the DWG are “L” brackets which are positioned in a way that engages both sides of the doorframe. The user’s body weight or tension from a resistance band or TRX strap applies counter clock wise pressure to the device which exerts sufficient force to secure the DWG in the doorway without slipping.
Notes: Before you begin....
- Make sure the door is in the fully open position.
- Remove clothes rack or other obstacles from behind the door.
- If a door stopper is being used, remove it.
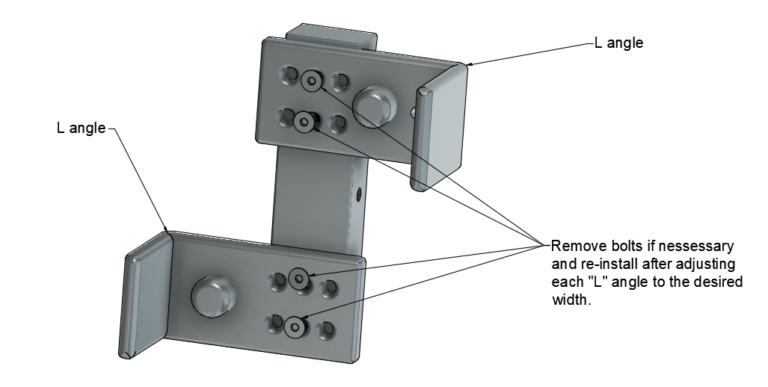
The bracket assembly can be adjusted to fit various width door-frames.
- Measure the width of the door-frame. If necessary….
- Remove bolts an re-adjust L angle to desired position
- Reinstall bolts and tighten.
Bracket assembly

DWG is simple to use.
The device is spring loaded. It must be compressed (squeezed) together for placement in the doorway.
- Start by rotating the push sleeve so the elongated slots are in line with the pin.
- Then slide the push sleeve to the right allowing it to go past the pin.
- Compress the DWG as noted below.
- Once DWG is placed in the desired position allow it to expand against the door-frame holding it in place.
- Adjust the push sleeve so that the stopper notch is resting on the pin.
- Once DWG is level, rotate the collar on the main bar counter clockwise until the device is firmly seated in the door frame.
How to compress the DWG?
Grab the left dip bar with you left hand and the right dip bar with your right hand. Squeeze both bars together to compress the device.
- Caution:
Do not over tighten the collar. Overtightening can damage the doorframe. Only use enough pressure to prevent the device from slipping within the doorframe when under a load.
#1,#2 - Line up slot in push sleeve with stopper pin and slide push sleeve to the right.
#3 - Using two hands grab left and right dip bars where they connect to the main bar. Squeeze to compress prior to inserting into the doorframe.
#4 - Once DWG is placed in the desired position allow it to expand against the door-frame holding it in place. Level the DWG - rotate push sleeve so that pin rests in stopper notch. Rotate collar counter clockwise until tight.
#5 - Pin resting in stopper notch. rotate push sleeve so that pin rests in the stopper notch. Rotate collar counter clockwise until tight.
#6 - Rotate collar counter clockwise to tighten.
DWG secured to door frame
To remove - rotate collar clockwise, rotate sleeve to line up with pin and compress device
Rotate and slide the sleeve to the right. Adjust so that the stopper notch is resting against the pin.
Tighten until firm. Do not over tighten
Compress

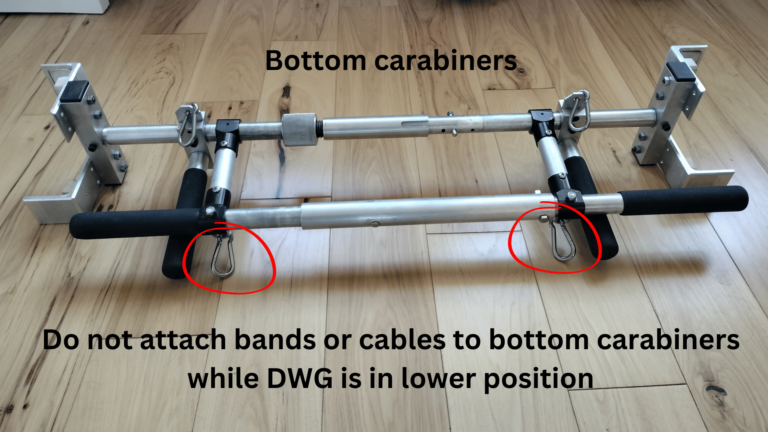
DWG in upper doorframe position use bottom carabiners.


